Rugala! This might not be what you would think of as a Christmas cookie but I think it works. This recipe is done in two steps; first we make the dough and then the filling. For the dough you will need to gather the following:
Starting from the top we have 8 ounces of cream cheese, two sticks of butter (both of these ingredients at room temperature), 2 tablespoons of sugar and 2 cups of flour. Put all of these into a mixer and blend until a dough forms. Place the dough on a floured surface and divide into four parts, as seen below.
Once the dough is divided, roll each quarter into a ball, like so:
Place a square of wax paper on the counter and lightly flour it. Place one ball on the paper and lightly flour the ball as well. Place a second piece of wax paper on the top and use a rolling pin to roll the ball into a ten-inch round.
I have been rolling out pie crusts for over 30 years and I have yet to achieve a form that I would consider round. They start out round but after a few strokes they become a sort of a lozenge shape. After that, they continue changing into what I can only describe as an amoeba shape. Go with your strengths. I'm making Amoeba-shaped Rugala.
When you have the four balls rolled, place them in the refrigerator for at least one full hour. They can stay in longer but no less than one hour. The dough must be sufficiently chilled or you will not be able to work with it. DO NOT SKIMP ON THIS STEP.
While the dough is chilling, gather the ingredients for the filling. You will need a 12 ounce jar of preserves. The flavor is up to you. You will also need one cup of ground nuts. Again, the flavor is up to you but it should be something that goes with the preserves. I used walnuts. You will need one cup of currants. For some reason, these are hard to come by in Los Angeles so I substituted raisins. Rounding out the picture below are 1/2 cup of sugar and 1 teaspoon of cinnamon. Mix these four ingredients together (do not mix in the preserves). Divide into four portions. Set aside.
After the dough is sufficiently chilled, remove it from the refrigerator and carefully peel off the top layer of wax paper. Prepare a surface to work on and lightly flour the surface. Turn the dough over on the prepared surface and remove the wax paper from the other side. (Do not follow the picture below; leaving the dough on the wax paper made quite a mess.) Spread 3 ounces of preserves on the dough. Here I used raspberry preserves.
Pour 1/4th of the filling ingredients over the preserves and spread it evenly. When finished, cut the dough down the center, then cut each half into quarters. Finally, cut each quarter evenly so you will have eight cookies from each ball of dough. My recipe calls for cutting into 12 pieces but I found that 8 was much easier to work with and came out better.
When you have them cut, roll them up starting at the pointed end (in the center) and rolling toward the wide end. Place them on a greased cookie sheet with the seam side down. Bake in a 375 degree oven for 17 minutes.
As soon as you remove them from the oven, place them on a rack to cool. When they are baking some of the filling will ooze out onto the cookie sheet. If you let them cool on the cookie sheet, they will stick to it from the part that oozed out. Also, wash the cookie sheet immediately, even though it's still very hot or you will have a fruit-flavored cement to try to chip off afterwards.
Bon appétit!
Monday, December 6, 2010
Monday, November 1, 2010
Banana Nut Muffins
This is a fairly easy recipe and a great way to use up over-ripe bananas. To make one dozen muffins you will need one cup of mashed banana, which amounts to about two regular sized bananas. Set your oven for 400 degrees and assemble together the following:
In the center is a muffin tray filled with paper liners. If you don't have paper liners, grease the bottom of each section. ONLY GREASE THE BOTTOM. If you grease the sides the muffins can't rise and you'll have a mess.
Starting at the top and following clockwise are the ingredients; 3/4 cup of milk, 1/2 cup of vegetable oil, one egg, 1 Tbsp. vanilla extract, 2 cups flour, 1/3 cup sugar, 3 tsps. baking powder and 1 tsp. salt, 1 cup mashed bananas and 1/2 cup chopped walnuts (pecans may be substituted).
Now begin making the batter:
Combine the milk, oil, egg and vanilla and mix well. Then add the flour, sugar, baking powder and salt and mix ONLY UNTIL THE FLOUR IS MOISTENED. The batter will be lumpy and this is how you want it.
Now add the banana and nuts and mix only until these are mixed in. You should only use a few strokes for this. Now let the batter sit for a few minutes before continuing.
After the batter sits for a few minutes, divide it evenly between the cups. Now let it sit for another few minutes before putting it in the oven. By letting the batter sit you will get better crowns on the muffins. When it's finished sitting, bake it for 18 to 20 minutes, or until the muffins are golden.
When they're finished, remove them from the pan immediately (so they don't continue cooking) and set them on a wire rack to cool.
Bon appetit!
In the center is a muffin tray filled with paper liners. If you don't have paper liners, grease the bottom of each section. ONLY GREASE THE BOTTOM. If you grease the sides the muffins can't rise and you'll have a mess.
Starting at the top and following clockwise are the ingredients; 3/4 cup of milk, 1/2 cup of vegetable oil, one egg, 1 Tbsp. vanilla extract, 2 cups flour, 1/3 cup sugar, 3 tsps. baking powder and 1 tsp. salt, 1 cup mashed bananas and 1/2 cup chopped walnuts (pecans may be substituted).
Now begin making the batter:
Combine the milk, oil, egg and vanilla and mix well. Then add the flour, sugar, baking powder and salt and mix ONLY UNTIL THE FLOUR IS MOISTENED. The batter will be lumpy and this is how you want it.
Now add the banana and nuts and mix only until these are mixed in. You should only use a few strokes for this. Now let the batter sit for a few minutes before continuing.
After the batter sits for a few minutes, divide it evenly between the cups. Now let it sit for another few minutes before putting it in the oven. By letting the batter sit you will get better crowns on the muffins. When it's finished sitting, bake it for 18 to 20 minutes, or until the muffins are golden.
When they're finished, remove them from the pan immediately (so they don't continue cooking) and set them on a wire rack to cool.
Bon appetit!
Monday, September 20, 2010
Beef Stew
This is a very basic recipe for beef stew. It will give you all of the necessary ingredients but realize that you are free to experiment as your taste dictates. If you think there are too many potatoes and not enough carrots, change the quantities. If you like more celery, add more. If you don't like celery, omit it. Look through your spice rack and add any spices you desire. This recipe should never be exactly the same each time you make it. Keep changing it up!
To begin with, you will need the following:
Starting in the upper left corner we have shortening (you'll use one tablespoon), four carrots peeled and chopped into bite-sized pieces, one pound of beef cut into one inch cubes (for this recipe, two pounds would have been better), three large potatoes peeled and cut into bite-size pieces, one stalk of celery (include the leaves) sliced thinly, one tablespoon parsley, one teaspoon basil, three tablespoons flour mixed with one teaspoon pepper and dusted with paprika, one onion cut into wedges. In the center is one bay leaf.
One word on the meat. In the market you can buy stewing beef which comes in a tray already cut up. Don't buy this. You don't have any way of knowing what the cut of meat is. Mostly likely, it's just whatever was left over all chopped up and packaged. Take the time to look through the beef section and see what they have. I was able to find a five pound london broil on sale for $1.99 a pound that I cut up myself. This way I get to remove all the fat before I cook it and I have leftovers for another meal.
Start with the meat. Melt the shortening in a skillet. Coat the meat with the flour mixture and cook in the shortening until the meat is browned on all sides, like this:

To begin with, you will need the following:
Starting in the upper left corner we have shortening (you'll use one tablespoon), four carrots peeled and chopped into bite-sized pieces, one pound of beef cut into one inch cubes (for this recipe, two pounds would have been better), three large potatoes peeled and cut into bite-size pieces, one stalk of celery (include the leaves) sliced thinly, one tablespoon parsley, one teaspoon basil, three tablespoons flour mixed with one teaspoon pepper and dusted with paprika, one onion cut into wedges. In the center is one bay leaf.
One word on the meat. In the market you can buy stewing beef which comes in a tray already cut up. Don't buy this. You don't have any way of knowing what the cut of meat is. Mostly likely, it's just whatever was left over all chopped up and packaged. Take the time to look through the beef section and see what they have. I was able to find a five pound london broil on sale for $1.99 a pound that I cut up myself. This way I get to remove all the fat before I cook it and I have leftovers for another meal.
Start with the meat. Melt the shortening in a skillet. Coat the meat with the flour mixture and cook in the shortening until the meat is browned on all sides, like this:
If your skillet is deep enough you can continue cooking in it. If it's not, transfer the meat to your preferred cooking pot and continue. Add three to four cups of water (depending on the size of your pot) and the spices. Heat until the water comes to a boil, then reduce the heat to a simmer place the lid on and cook for one hour. At the end of this time the meat should be cooked through and tender.
Add the vegetables. If too much of them are out of the water you can add a little more water. Replace the lid and cook an additional thirty minutes. You will know the stew is done when the potatoes and carrots pierce easily with a fork.
The finished stew will look like this:

Bon appetit!
Bread Pudding with Whiskey Sauce
Coming from a family of nine children it goes against my upbringing to waste food. Since I live alone, I can rarely finish an entire loaf of bread on my own before it goes stale. I feed some of it to the local birds but the remainder either gets thrown away or needs to be recycled. This recipe is a great way to use up a good portion of a leftover loaf. You will need the following items:
Starting at the top and going clockwise, we have a covered casserole dish (if it doesn't have a cover you can use aluminum foil), 3 eggs lightly beaten, butter (you'll decide how much to use), 1 tsp. cinnamon and 1/2 tsp. nutmeg, 1/2 cup raisins, 8 slices of bread (homemade bread is especially good), 1/2 cup sugar and 2 cups milk.
Start by preparing the bread. Butter one side of each slice like so:
When all eight slices have been buttered set one slide aside. Take the first slice and place it butter side up in the bottom of the casserole. Take the remaining six slices and arrange them around the bottom slice, overlapping each slice slightly. It will look something like this:
Set this aside. Now mix together the eggs and sugar until all sugar is dissolved. Add the remainder of the ingredients making sure each ingredient is thoroughly mixed through. It's easier to do this if you leave the raisins for last. When finished, pour the liquid mixture into the center of the casserole and place the last slice of bread on top, butter side down. It will look like this:
I take these pictures myself and I wasn't able to photograph this next step because my hands were wet. Place your very clean hands on the top slice of bread and press the entire thing down until all bread is soaked through. Place the lid on the casserole and set it aside for ten minutes. At the end of this time, place it in a 325 degree oven and let it bake for 30 minutes. Remove the lid and continue baking an additional 30 minutes.
To make the Whiskey Sauce - place one stick of butter in a saucepan and melt over very low heat. It is important that the heat be kept low as if it's too high the butter will burn. When the butter is completely melted, add one cup of brown sugar and stir to dissolve. Then add one tablespoon flour and mix it through. When all have been blended together add 1/2 cup of boiling water. Continue cooking and stirring until the mixture turns clear. At this point remove it from the heat and add 1/3 cup of whiskey. I use a good Irish whiskey, like Jameson's but any whiskey will do.
Serve the whiskey sauce hot over the bread pudding.
Bon appetit!
Hard Boiled Eggs
Have you ever peeled open a hard boiled egg only to find the yolk had started to turn green? While this discoloration won't hurt the egg or have any effect on the taste, it doesn't look good. The cause of this is over-cooking and is very easy to prevent.
First, place your eggs in a saucepan with plenty of head room (room above the eggs), like so:
Add enough cold water to cover the eggs by at least one inch:
Bring the eggs to a boil over medium heat. As soon as the water begins to boil, remove the pan from the heat source. Set a timer for 14 minutes. The water is hot enough to continue slowly cooking the eggs for this time. At the end of 14 minutes, immediately run the eggs under cold water. As soon as they are cool enough to handle, place them in the refrigerator (if you won't be using them right away).
When you peel the eggs, what you will have is this:
Perfectly cooked eggs without any discoloration.
Another way of making them is to use a steaming basket. Set the basket in a pan and pour water in to the bottom of the basket. Turn the heat on high until the water boils. Add the eggs and reduce the heat to simmer. Put a lid on the pan and wait 14 minutes. Then remove from heat and immediately put the eggs in cold water with plenty of ice added. Add ice as needed to cool the eggs as quickly as possible. Refrigerator the eggs once they have cooled.
Bon appetit!
Sunday, June 20, 2010
Banana Nut Bread
Like most fruit breads, this is a quick bread, so called because it doesn't use yeast to make the dough rise. The most important thing to remember about quick breads is that when you grease the pan, you only grease the bottom. If you grease the sides the bread doesn't have anything to grab onto as it rises, and you'll wind up with very flat bread.
Assemble your ingredients while you preheat the oven to 350 degrees.
In the upper left corner is the pan (with the bottom only greased). Going clockwise from there is a measuring cup with the mashed bananas. You need 1 1/2 cups of mashed bananas, which is about 3 or 4 bananas, depending on their size. Next is 1 cup of sugar, 1/3 cup of margarine (softened), 1/3 cup of water, 1 2/3 cups of flour, 2 eggs and 1/2 cup chopped nuts. I used pecans, but walnuts work just as well. The small bowl in the lower center portion of the picture is the spices. I put them all in one bowl, and it includes 1 tsp of baking soda, 1/2 tsp salt, 1/4 tsp baking powder, 1/2 tsp cinnamon and 1/4 tsp nutmeg.
Mix together the sugar and butter until well blended. Stir in the eggs. When mixed thoroughly, add the bananas and water and beat for 30 seconds. Add all the other ingredients except the nuts and mix until moistened. Don't mix longer than this. Finally, stir in the nuts.
Pour into the prepared pan and bake and 8-inch loaf for one hour fifteen minutes. A 9-inch loaf will take 55 to 60 minutes. You'll know it's done when a toothpick inserted near the center comes out clean.
Cool on a rack for five minutes, then loosen the sides and remove the pan. Allow it to cool completely before slicing. It will slice easier if it's cooled. If you want to eat it while it's still warm, you might not get clean slices, but it will taste just as good.
Bon appetit!
Wednesday, April 7, 2010
Scones
Scones are along the lines of a tea biscuit, and are really one of the easiest things to bake. First, assemble your ingredients like so:
Starting at the top center and going clockwise, they are; 1 3/4 cups of flour, 4 to 6 tablespoons half-and-half (still in the carton), 1 beaten egg, 2 1/2 tsps baking powder, 3 tbls sugar, 1/2 tsp salt, 1/3 cup butter (cut up) and 1/2 cup currants. At the bottom of the photograph is a pastry blender. You can either use this or a food processor.
If you are making these by hand, use the pastry blender and cut the butter into the flour, sugar, baking powder and salt until the mixture resembles fine crumbs. Stir in the egg, currants and enough half-and-half so the dough leaves the side of the bowl.
If you're using the food processor, follow the same steps as above, but in the processor. Follow the instructions for your particular model for making dough. For my Cuisinart I had to use the blade rather than the pastry blade. It made one slight difference (which I'll discuss later).
Place them on an ungreased cookie sheet and brush the dough with beaten egg like so:
The strange looking one on the left was made from the leftover dough that wouldn't fit into the cutter. Bake them in a 400 degree oven for 10 to 12 minutes. When you remove them from the oven immediately take them off the cookie sheet and cool them on a wire rack.
Your end result will look like this:
Bon appetit!
Starting at the top center and going clockwise, they are; 1 3/4 cups of flour, 4 to 6 tablespoons half-and-half (still in the carton), 1 beaten egg, 2 1/2 tsps baking powder, 3 tbls sugar, 1/2 tsp salt, 1/3 cup butter (cut up) and 1/2 cup currants. At the bottom of the photograph is a pastry blender. You can either use this or a food processor.
If you are making these by hand, use the pastry blender and cut the butter into the flour, sugar, baking powder and salt until the mixture resembles fine crumbs. Stir in the egg, currants and enough half-and-half so the dough leaves the side of the bowl.
If you're using the food processor, follow the same steps as above, but in the processor. Follow the instructions for your particular model for making dough. For my Cuisinart I had to use the blade rather than the pastry blade. It made one slight difference (which I'll discuss later).
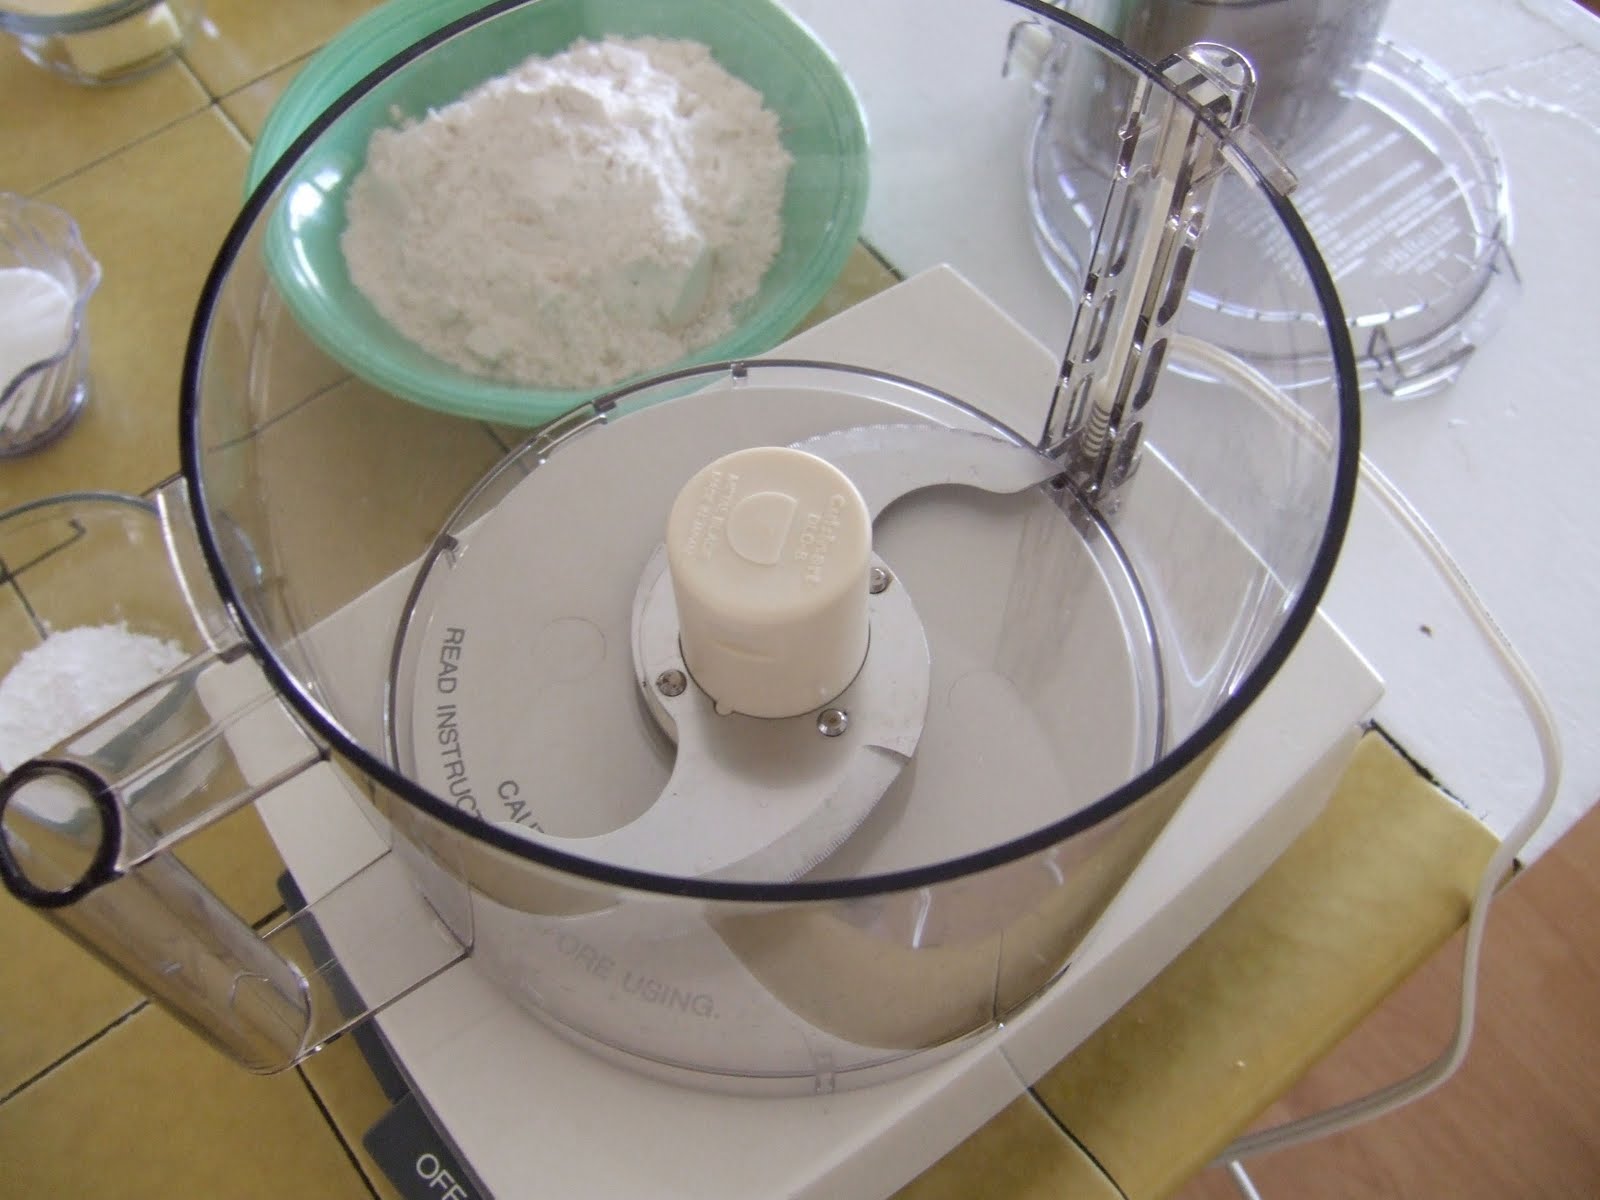
This is what the Cuisinart looks like with the blade in place.
Once the dough is formed, roll it into a ball and place it on a floured surface. I use a pastry board for this, but a counter top will work too. Notice the specks in the dough? It looks like poppy seeds. Those are the currants. The drawback to using the Cuisinart is that the slicing blade chopped up the currants. The finished scones tasted fine, but looked a little funny. Doing it by hand doesn't do this.
Knead the dough ten times and then roll it out 1/2 inch thick. Then use a two inch round cookie cutter to cut them out like this:
Place them on an ungreased cookie sheet and brush the dough with beaten egg like so:
The strange looking one on the left was made from the leftover dough that wouldn't fit into the cutter. Bake them in a 400 degree oven for 10 to 12 minutes. When you remove them from the oven immediately take them off the cookie sheet and cool them on a wire rack.
Your end result will look like this:
Bon appetit!
Subscribe to:
Posts (Atom)